My 3 Go-To Headshot Lighting Setups.
When I have a studio headshot session, I try to get a feel for the overall mood and style my subject wants. If it is for actor headshots, corporate headshots, or some personal branding, the lighting is a big part of the overall result.
I, of course, also have my go-to setups for headshot lighting. These setups work well for all different people – they’re flattering, create nice catchlights in the eyes, and I know the setups off by heart. They all just need slight tweaking from person to person.
Let’s have a look:
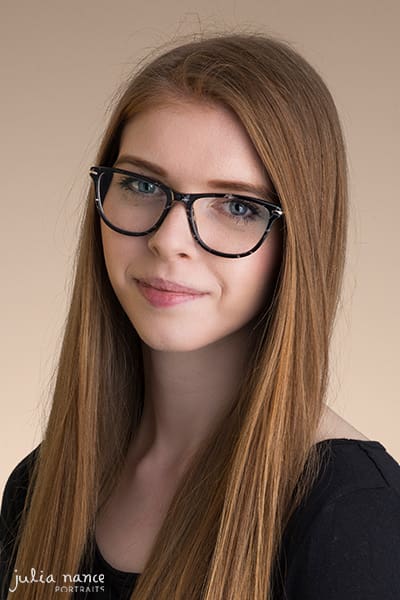
Set Up One: Clamshell Lighting


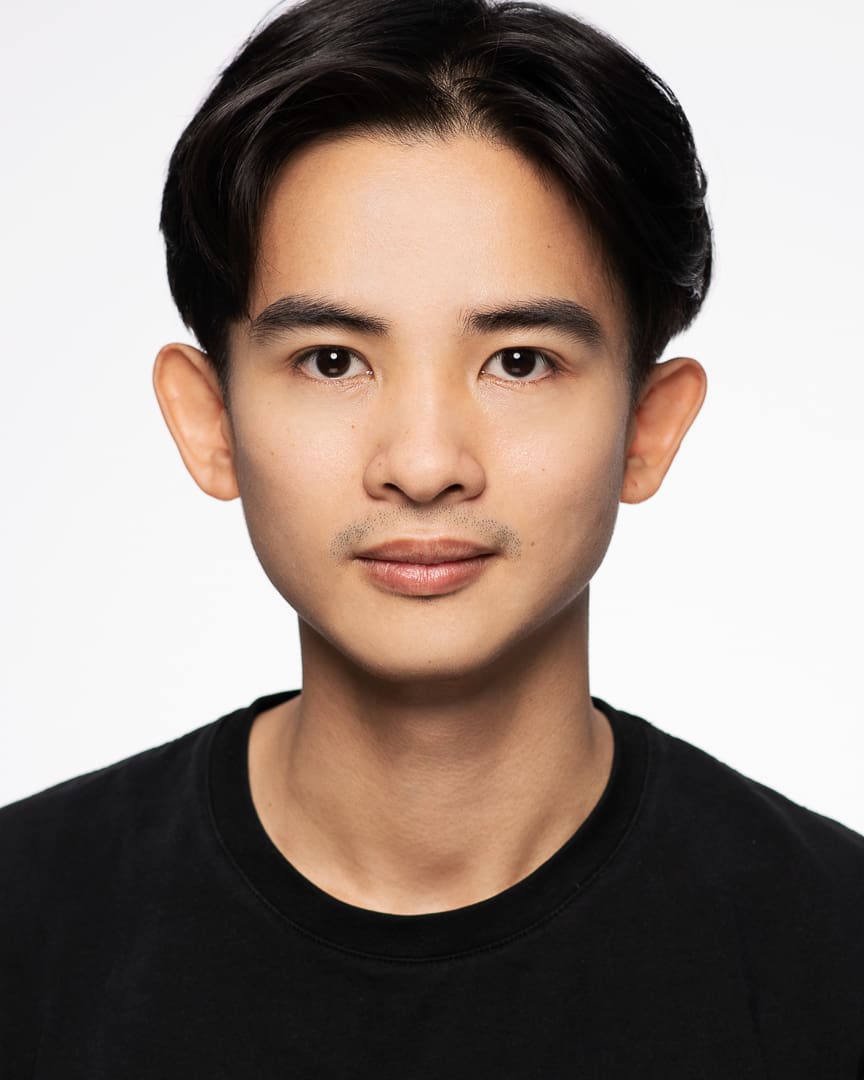
I love this lighting. It’s called clamshell, because of the positioning of the lights. One is above and angled down, and the other is below and angled up. The lower light in my setup is set to a lower power, allowing for some dimension of the face. It still helps ensure that we don’t have any crazy harsh shadows or lines going on. The top light is in a position to create those catchlights at the top of the eyes. This light also wraps around the face. You can see in the images above that there is lovely symmetry and dimension created by soft shadows.
You will also notice my top light has a honeycomb grid on it. This helps direct the light. It takes a little bit off the background and helps build some contrast back into the shot. You’ll notice though that overall the lighting remains quite soft, but it manages to highlight his bone structure and it creates an interesting and dynamic image.
This setup can also be used as a one light setup. Without the bottom light, a simple reflector can be used. Depending on the top light’s position, the absence of the fill light from the bottom can create some different face dimension. You can see what the effects of each light are below:
Setup 2: One light side lighting.

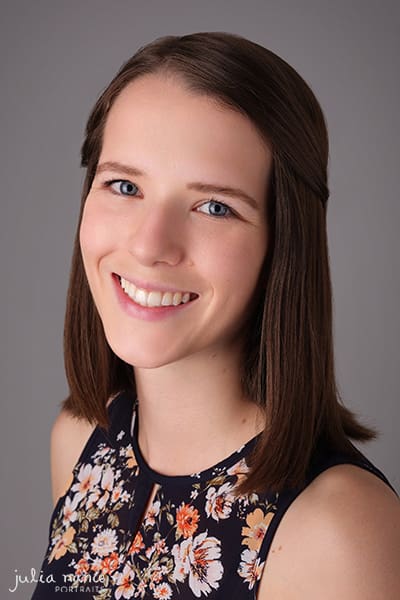
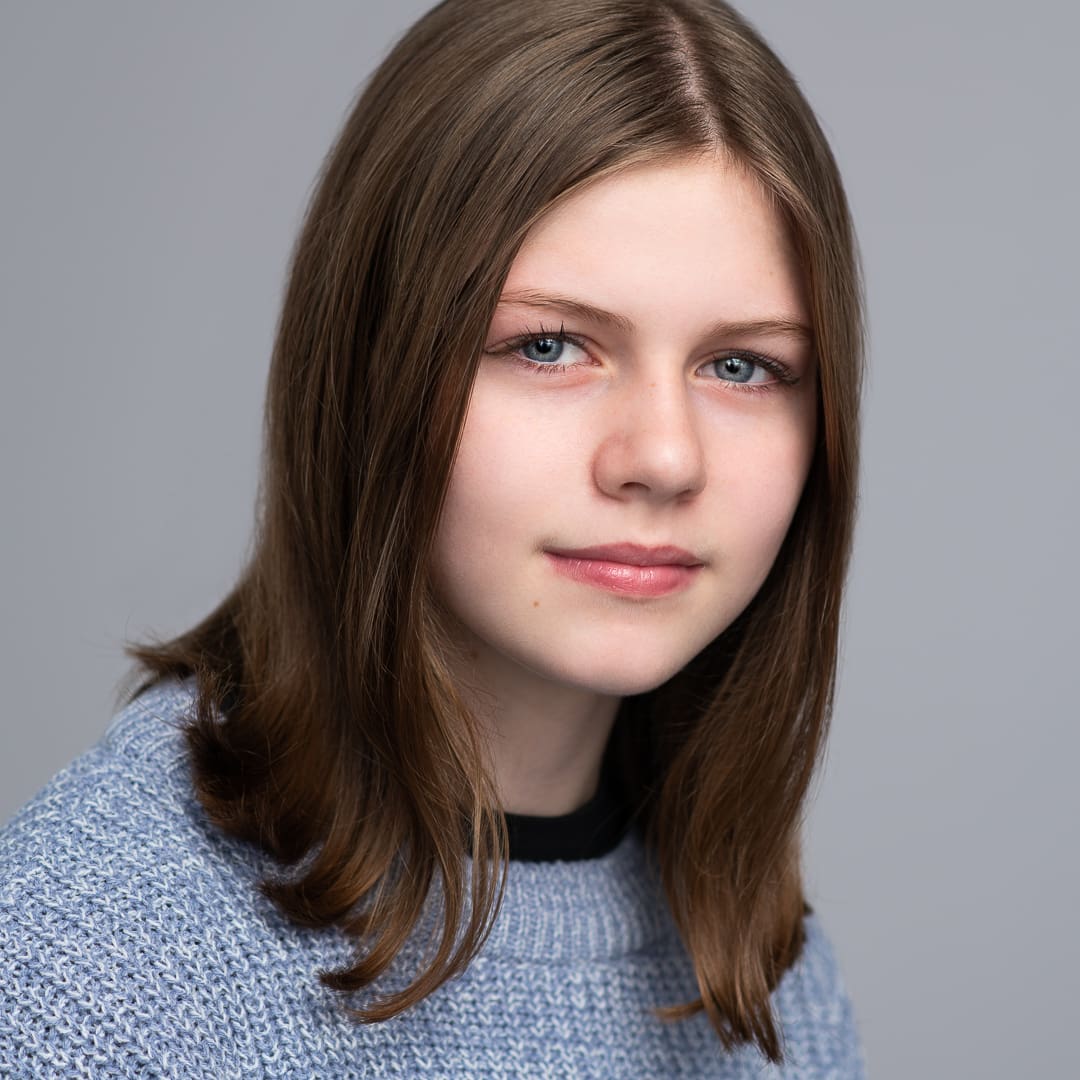
This is quite a simple setup. It only requires one light, and I usually use a large light source. The softbox in the photo is quite big – it’s pretty much as tall as me, so it creates a nice, large light source. Paired with this is a polyboard reflector, which I have to fill in the shadows on the opposite side of the face.
You’ll see in the headshots above how soft this setup is. Her eyes have lovely, wide bright catchlights on one side, which gives some sparkle and life into the shots. With the bounce, we fill in the shadows, but still allow for shape in the face – not too flat!
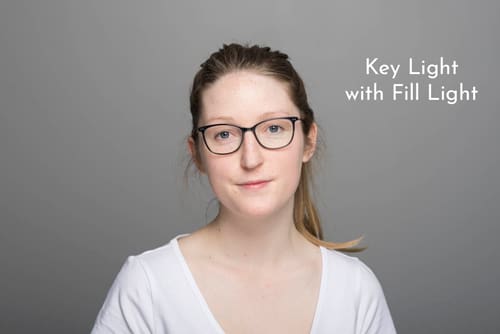
Setup 3: ‘Signature Light’
The third go-to setup I’ll refer to as ‘signature light’, because this is the term that photographer Felix Kunze has called it. Felix created The Lighting Series, which is a fantastic resource for photographers experimenting and improving their studio lighting.
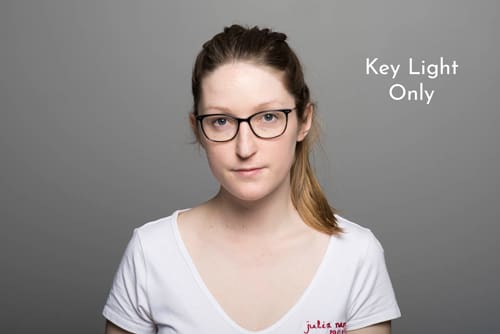
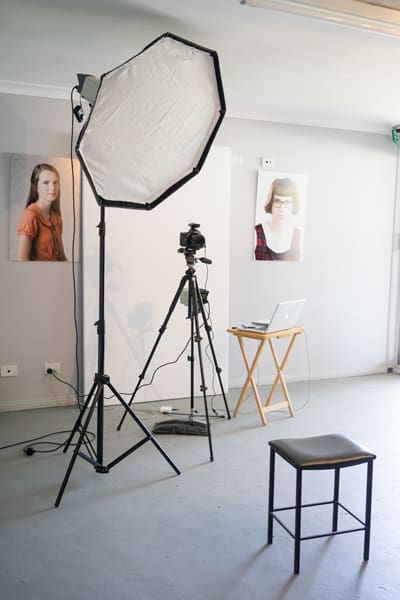
This type of lighting uses two strobes. The first light is the key light. I usually use the key light in my octobox, and use this to create more direction in the light. You can see in the images above that the key light has come from camera right, on a higher angle. Generally, I aim my key light a little away from the subject. Either above their head or pointed away (so the light comes over or across them, rather than directly on them). This gives a soft quality of light.
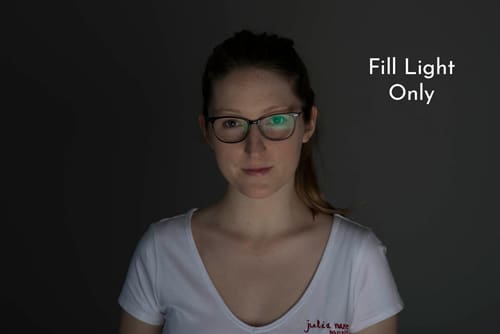
The second strobe is used to fill the shadows. A bare bulb aimed towards a white wall or reflector. When it fires, the light is bounced off and spread widely onto the subject (you can see this in the photo above, behind my tripod). It creates a little touch of light to fill in all the shadows created by our key light.
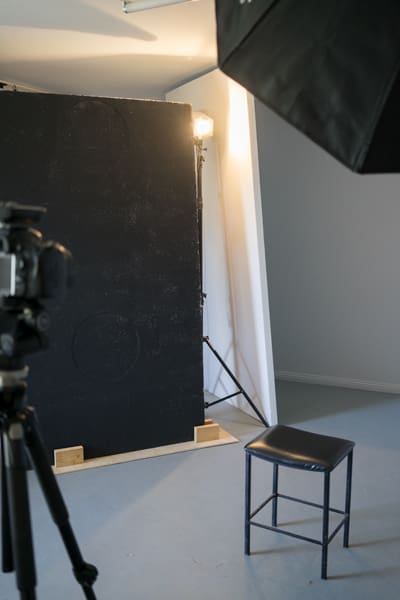
To change up the signature setup, it’s a matter of moving the key light for different results. You can also add a third hair or rim light into the mix to create a different look altogether (as in the second BTS photo above, with a sample result below):

While there is so much to studio lighting than these three setups, these are some of the ways I light my headshots and portraits. Studio lighting is a lot of fun, and it’s really a matter of slowing down and observing the light as you go. Little adjustments can go a long way, and the main thing for me is to keep the light flattering, and preserving details in the highlights and shadows.